Showing posts with label SSIS. Show all posts

Monday, June 3, 2019

Continuous Deployment (CD) with Azure DevOps, SSIS, and SQL Server Database Projects

What are we doing here?

This is the second part of a two-part series covering 1) CI (continuous integration/build) and 2) CD (continuous deployment/release) for Visual Studio SQL Server Database and Integration Services project types using the Azure DevOps) platform.

Some background

The Visual Studio business intelligence (SSIS, SSRS, SSAS) and database projects types have long been the red headed step child of the Visual Studio ecosystem. Huge strides have been made in recent years but there are still some impediments, one of which is creating CI/CD pipelines for these projects in Azure DevOps.

Don't fret

This step-by-step guide will walk you through creating a release pipeline for a solution containing both a SQL Server Database project and an Integration Services project.

Assumptions (you know what they say...)

The following steps assume that you have already have a working Azure DevOps build definition. If not, you can refer to part 1 of this series.


Let's do it

  1. Navigate to /Project/Pipelines/Releases and select New Release Pipeline.
  2. Choose “Start with an Empty job”.
  3. Name the Stage. An appropriate name might be the environment you’re deploying to such as “Development”.
  4. Click “Add an Artifact”.
  5. Select “Build” as the source type and choose the Project and Source (build pipeline) that will be deployed. If you haven’t already created a Build definition, see Continuous Integration (CI) with Visual Studio Team Services (VSTS), SSIS, and SQL Server Database Projects.
  6. Click the lightning bolt on the newly created Artifact, enable the Continuous deployment trigger and add a branch filter for master or whatever branch will be deployed.
  7. Click on the “1 job, 0 task” link in your newly created Stage.
  8. Click the plus sign to the right of “Agent job” to add a new task.
  9. Search for “Command Line” and add a new task.
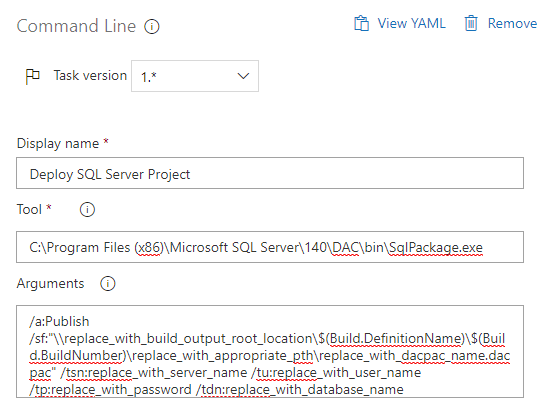
  10. Click on the new task and add populate the properties as follows.
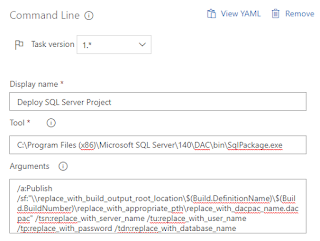
    Keep in mind that this code is using SQL Server 2017. If you’re using another version, you’ll likely have to modify the Tool path.

    Argument text: /a:Publish /sf:"replace_with_build_output_root_location\$(Build.DefinitionName)\$(Build.BuildNumber)\replace_with_appropriate_path\replace_with_dacpac_name.dacpac" /tsn:replace_with_server_name /tu:replace_with_user_name /tp:replace_with_password /tdn:replace_with_database_name
  11. Add another Command Line task and populate as follows.
    Argument text: /S /ModelType:Project /SourcePath:"replace_with_build_output_root_location\$(Build.DefinitionName)\$(Build.BuildNumber)\replace_with_appropriate_path\$(BuildConfiguration)\replace_with_ssis_ispac_name.ispac" /DestinationServer:"localhost" /DestinationPath:"/replace_with_appropriate_ssis_catalog_path"
  12. The previous tasks use a variable to tell us which build configuration to use. Add the variable by clicking on the “Variables” tab, then click +Add, enter “BuildConfiguration”, and set a default value that is the name of the build configuration that is appropriate for this Stage of the pipeline. This will depend on the names of the configurations that have been created in your Visual Studio solution.
  13. Always test! Create a release and make sure it deploys your projects correctly.

As always, if you have any questions feel free to drop me an email at david@elish.net.


Thursday, May 3, 2018

Integration Services Catalogs Node Not Visible in SSMS When Connecting to Azure Server w/ Azure SSIS Integration Runtime

So you went through all the steps to configure and deploy SSIS on Azure using an Azure SQL Server, Azure SQL Database (for SSISDB), Azure Data Factory v2 (ADF v2), and the Azure-SSIS Integration Runtime type but when you connect to the SQL Server using SSMS you don't see the familiar Integration Services Catalogs node. You see something like this:


Don't fret. You likely configured and deployed everything correctly and the service is eagerly awaiting your requests. All you have to do is explicitly specify the SSISDB when connecting. To do this, click the Options>> button in the connection dialog and enter SSISDB as the database name.


Click Connect and you should be good to go!


Thursday, April 26, 2018

Continuous Integration (CI) with Azure DevOps, SSIS, and SQL Server Database Projects

What are we doing here?

This is the first part of a two-part series covering 1) CI (continuous integration/build) and 2) CD (continuous deployment/release) for Visual Studio SQL Server Database and Integration Services project types on the VSTS (Visual Studio Team Services) platform.

Some background

The Visual Studio business intelligence (SSIS, SSRS, SSAS) and database projects types have long been the red headed step child of the Visual Studio ecosystem. Huge strides have been made in recent years but there are still some impediments, one of which is creating CI/CD pipelines in Visual Studio Team Services.

Don't fret

While it's not as straightforward as say a ASP.NET web application, with just a little finessing it's not overly difficult to build and deploy SQL Server Database and Integration Services project types. If you're familiar with creating VSTS build and release definitions it probably wouldn't take you too long to get it figured out. If you are new to this functionality it can definitely be a bit overwhelming. Hence, this step-by-step guide to standing up a basic VSTS build definition that includes both database and SSIS projects.

Assumptions (you know what they say...)

The following steps assume that 1) you have a VSTS account 2) a VSTS collection, 2) a VSTS project within the collection and 3) have a source control repository in VSTS Git, TFVC, GitHub, Subversion, Bitbucket Cloud, or Git (not necessarily hosted by VSTS).


This walk through will use an open source project called SSISProjectWeaver that is hosted on GitHub (using a different repository type requires little, if any changes). It's not necessary to know the details of the SSISProjectWeaver project other than that it contains a SQL Server Database project and two Integration Services projects.

<plug>If you're starting a new SSIS project it's worth checking out SSISProjectWeaver as it's a 100% non-invasive ETL framework that provides metadata-driven parallelism and dependencies between any two packages or groups of packages, extensive logging, reporting and dashboarding, alerting, and a bunch more. It's easy to set up and has been proven in large organizations with hundreds of packages running a day. You don't have to modify your existing code and if you don't like it you just stop using it. Nothing will have to change with your existing packages.</plug>

Let's do it

  1. Open you VSTS project and click on the Build and Release tab.
  2. Choose your source. For this example we are going to use GitHub.
  3. Once you've connected to the repository, select the branch that you want to build and click Continue.
  4. In the top right-hand corner under Select a template, click Empty Process. This will start us off with a blank build definition.
  5. Name your build definition appropriately and then choose the Agent queue. In this example we are using a Hosted VS2017 queue. Depending on your project you might want to use a local/on-premise build agent of VS2015. It all depends on your project types, versions, dependencies, etc.
  6. Before we define our build tasks let's create some variables. Click on the Variables tab and create the BuildConfiguration and BuildPlatform variables along with their corresponding default values.
  7. Navigate back to the Tasks tab and click the next to Phase 1. Search for and choose the Visual Studio Build task. This task will use the out-of-the-box msbuild template for building SQL Server database projects with a .dacpac as the build output.
  8. Change the Display name to something meaningful.
  9. Choose the SQL Server database project or solution to build.
  10. Choose the version to build.
  11. Use the newly created variables for the Platform and Configuration properties.
  12. Save the task.
  13. Navigate back to the Tasks tab and click the + next to Phase 1. Search for and choose the Command Line task. We will use this task as a workaround to a lack of an msbuild template for SSIS projects by calling invoking devenv to build the projects.
  14. Change the version to 2.*(preview). This version allows multi-line commands similar to a .bat file.
  15. Change the Display name to something meaningful.
  16. Enter the following text into the Script box. The first 8 lines just echo (print line) info that is useful for debugging. The last line is the actual command that is being executed.
    echo BuildShare: $(BuildShare)
    echo Agent.BuildDirectory: $(Agent.BuildDirectory)
    echo Build.SourcesDirectory: $(Build.SourcesDirectory)
    echo Build.ArtifactStagingDirectory: $(Build.ArtifactStagingDirectory)
    echo System.DefaultWorkingDirectory: $(System.DefaultWorkingDirectory)
    echo BuildConfiguration: $(BuildConfiguration)
    echo BuildPlatform: $(BuildPlatform)
    echo Command: "C:\Program Files (x86)\Microsoft Visual Studio\2017\Enterprise\Common7\IDE\Devenv.com" "$(Build.SourcesDirectory)\your_project_or_solution_name.(sln|proj)" /build $(BuildConfiguration)

    "C:\Program Files (x86)\Microsoft Visual Studio\2017\Enterprise\Common7\IDE\Devenv.com" "$(Build.SourcesDirectory)\your_project_or_solution_name.(sln|proj)" /build $(BuildConfiguration
  17. Save the task.
  18. Click on the Triggers tab and enable continuous integration. This will enable VSTS to execute this build definition each time code is committed to your source control repository.
  19. Test the build definition by clicking on Queue.
  20. Assuming your build was successful, you now have the CI half of your CI/CD pipeline and can auto-notify the world when one of your co-workers breaks the build!

Wrap Up

When it comes to technology, nothing is ever as simple as it appears. The SSISProjectWeaver solution is pretty straightforward in terms of code and dependencies. It's T-SQL and SSIS packages with no external dependencies. Building it is is very straightforward as you can see above. However, many projects are much more complex and require more complex configurations to set up a build definition. For example, the first time I created a build definition with an SSIS project it failed because I had references to 3rd party components. Of course Microsoft doesn't know I am using those components so it's not on their hosted build servers. To make it work I had to give up the convenience of using a hosted build server and stood up my own build server with all the necessary components. Food for thought. Don't be discouraged if you hit a few stumbling blocks on your way to automated build bliss!

Stay tuned for part two which will cover CD (continuous deployment) and will walk you through getting your code deployment automated.

As always, if you have any questions feel free to drop me an email at david@elish.net.

Wednesday, March 5, 2014

SSIS Lookup Transformation Using Salesforce.com as a Data Source

Pragmatic Works offers a Salesforce.com Source component as part of its Task Factory SSIS component library. Using this component along with the out-of-the-box SSIS Cache Transform, it is possible to populate a Lookup Transformation with Salesforce.com data.

*Note: this post assumes you have, at a minimum, installed the trial version of the Pragmatic Works TaskFactory product.

Example scenario where this is useful: We have a data warehouse that contains customer account data. Each customer account can have a broker that is responsible for servicing the account (each account can have 0 to 1 broker and each broker can have 0 to many accounts). We want to write this data warehouse account data to a Salesforce.com Account object. The Salesforce.com Account object also has a relationship to a Broker object. In order for us to maintain this relationship in Salesforce.com, it is necessary for us to pass the Salesforce.com internal Broker Id when writing the data to Salesforce.com. Since we do not maintain the Salesforce.com Broker Id in our data warehouse me must look it up from Salesforce.com using a Broker Number that is a unique Broker identifier in our data warehouse. Since we cannot use the Salesforce.com Connection Manager in a Lookup Transformation we will use an approach that leverages the Cache Transform to allow us to have a Lookup Transformation that uses Salesforce.com data.

Let's take a look at the Control Flow of our package. 

As you can see, this simple package contains two Data Flows. The first (PopulateLookupCache) populates the Cache Transform  and the second (OleDBSourceToSalesforce) writes data to Salesforce.com . I've highlighted three of the components necessary to make this happen. The first is the PopulateLookupCache Data Flow and the second and third are Connection Managers of types CACHE and SALESFORCE.

Let's look at the PopulateLookupCache Data Flow.

This Data Flow uses the Pragmatic Works SalesForce.com Source component to retrieve data from Salesforce.com using a SOQL query and populates a Cache Transform (LookupCache) with the internal Salesforce.com Id and the external Id (BrokerNumber). Below is the Cache Connection Manager definition. Note the Index Position value of 1 for the BrokerNumber column. This means that BrokerNumber will be the column used to perform the lookup when we define our Lookup Transformation.

Now that we've populated our Cache Transform we can move on to our primary Data Flow that will perform our lookup using our cached Salesforce.com data.

In this data flow we retrieve Account data from a SQL Server database using our OleDBSource Connection Manager to write data to the Account object in Salesforce.com. In between our source and destination components we have 1) a Data Conversion transformation to convert our source system's BrokerNumber from non-unicode (VARCHAR/STR) to unicode (NVARCHAR/WSTR) and 2) our broker lookup that uses Salesforce.com data to retrieve the Account's Salesforce.com internal Broker Id using our source system's broker number.

Let's take a look at our lookup. As you can see, we're using the Cache connection manager connection type as opposed to the OLE DB connection manager connection type that we're so used to. This allows us to use the Salesforce.com data that we wrote to the Cache Transform in our previous data flow.

Next, we set the Connection to our LookupCache Connection Manager.

Once we've set our data source we can configure the lookup columns.

We join on our data warehouse BrokerNumber to retrieve the Salesforce Broker Id that we alias as Broker__c since this is the name of our Salesforce.com Account object's broker field.

As you can see from this post, using the Pragmatic Works Task Factory Salesforce.com Source component and the out-of-the-box Cache Transform component, it is possible to populate a Lookup Transformation with Salesforce.com data even though the Lookup Transformation does not directly support a Salesforce.com Connection Manager.


Friday, August 10, 2012

SSIS Event Handlers: Behavior In Package Hierarchy


I recently stumbled onto what seemed to be an odd performance problem in an SSIS project I was working on. The problem was that I had a number of straightforward packages that ran extremely fast but sometimes, without explanation, ran really slow.

Luckily the project included a robust logging system that provided, among other things, the execution duration of every package and Control Flow task.  The logs showed that the Data Flows in the packages in question were running in 10 to 20 seconds yet the packages were at times taking upwards of 20 minutes. Furthermore, I found that when called on their own, each package did not run much longer than its single data flow, yet when run as a child of another package (via an execute package task) the execution duration more than doubled. In one example I had a package that ran in 10 seconds on its own, 23 seconds as a child, 56 seconds as a child 3 levels deep, and almost 3 minutes when run as a child four levels deep. In that same example the Data Flow took only 7 seconds. So why was the package so slow when run as a child of one or more packages?

Time for SQL Server Profiler.

The logging mechanisms in place were stored procedures being called by Execute SQL tasks and were being passed things like a batch Id, Package Id, Source Name, Source GUID, Start Time, End Time, etc. Once I began profiling it was clear that there were way too many Pre and Post execute logging stored procedure calls.

Let me take a step back and explain the project/package design. The project contained about 50 SSIS packages, some of which were being called by Execute Package tasks within the project. For example, there was a Master package which called some staging packages and some staging packages that called lower level staging packages, and those in turn called some generic logging packages. There were as many as four packages in any given package execution hierarchy. In each package, regardless of where in the package hierarchy it fell, there were four event handlers:
  1. OnError: Handled exceptions that were then logged to the log database.
  2. OnVariableValueChanged: Handled the change in those variables we were interested in and logged to the log database.
  3. OnPreExecute: Handled the logging of the pre-execution data (e.g. start time, source name, etc.) for all package tasks.
  4. OnPostExecute: Handled the logging of post-execution data (e.g. end time) for all package tasks.
Getting back to what I was seeing in Profiler (many calls to the Pre and Post execute logging stored procedures), it only made sense that the OnPreExecute and OnPostExecute event handlers were being fired each time the logging stored procedures were being called. So why would those event handlers fire so many times?

I started to research event handlers propagation to understand what happens in SSIS when we have package level event handlers and a package design in which packages call other packages. I quickly ran into Jamie Thomson’s “SSIS: Understanding event propagation” blog post. In his post he talks about three things:
  1. Events being caught by more than one event handler.
  2. Event handlers firing events.
  3. The System::Propagate variable.

Numbers 1 and 2 were what I was most interested in. Number 3 is something I’ve written about in the past in a blog post title “SSIS Foreach Loop Container: Continue on Error” when explaining how to continue a Foreach Loop container when a child task fails.

I took Jamie’s example and modified it to fit my situation which was a four package hierarchy with a single Control Flow task (empty script task just to get the event handler to fire) in the lowest level package and an OnPostExecute event handler in all packages. Instead of an empty Control Flow task in the parent packages, an Execute Package task was used to call the package one level down (e.g. Package_Level2 called Package_Level1, PacakageLevel3 called Package_Level2, etc.). Screen shots below depict the design.

Package_Level1 Control Flow

Package_Level1 OnPostExecute Event Handler

Package_Level2 Control Flow w/ Execute Package Edit Dialog


When running this sample package(s) I found that each subsequent level in the hierarchy more than doubles the number of events fired. When running Package_Level1 the OnPostExecute event handler is executed twice. Once for the Level1_EmptyControlFlowTask task and then again for the OnPostExecute of the package itself.  When running Package_Level2 the OnPostExecute event handler is fired a total of 8 times. See the table below. Package_Level1 bubbles up the Level1_EventHandler (twice), the Level1_EmptyControlFlowTask, and the Package_Level1 OnPostExecute events to the Package_Level2 event handler. In addition to those 4 events we still have the original two events we say when executing Package_Level1 on its own. And, we have the Package_Level2 OnPostExecute events for the Level2_ExecuteChildPackage (call to execute Pacakge_Level1 package) and the Package_Level2 package execution.

Sequence
Event Handler Package
Task
Event
1
Package_Level1
Level1_EmptyControlFlowTask
OnPostExecute
2
Package_Level2
Level1_EventHandler
OnPostExecute
3
Package_Level2
Level1_EmptyControlFlowTask
OnPostExecute
4
Package_Level1
Package_Level1
OnPostExecute
5
Package_Level2
Level1_EventHandler
OnPostExecute
6
Package_Level2
Package_Level1
OnPostExecute
7
Package_Level2
Level2_ExecuteChildPackage
OnPostExecute
8
Package_Level2
Package_Level2
OnPostExecute

When we execute Package_Level4 we see a total of 52 events fired, all triggered by the single Level1_EmptyControlFlowTask task in Package_Level1.
Below is the formula for determining how many additional events will be fired by the top-level package in a package hierarchy, per Control Flow task when there is a single OnPostExecute event handler task in all packages in the hierarchy.

y = 2^n + x

x = previous package level’s additional events
n = level in package hierarchy (starting at base package level 1)
y = total additional events fired at level n

Package Level
Calculation
Additional Events Fired
Total Events Fired
1
2^1 + 0
2
2
2
2^2 + 2
6
8
3
2^3 + 6
14
22
4
2^4 + 14
30
52
5
2^5 + 30
62
114

As you can see, having nested packages with package level event handlers can create quite a bit of overhead. I initially failed to see this in my logs because my logging stored procedures were ignoring the event handlers that were fired by other event handlers. However, the process still had the overhead of all the events firing and the stored procedure calls, the data just wasn’t being persisted to the database.

Event handler behavior can be very tricky. Don’t be like me, understand what’s happening before implementing your event handler logic.

Tuesday, June 19, 2012

SSIS Transactions Including Oracle Data Sources

Microsoft SQL Server Integration Services has the out-of-the box capability to handle transactions. I won't get into the details of how to use it as this post is specifically geared towards including an Oracle data source/Connection Manager in a transaction. For an overview of transactions in SSIS as well as enabling MSDTC to support this capability, please refer to the links below.

When using transactions with only SQL Server Connection Managers the typical gotcha for the uninitiated is the MSDTC requirement mentioned above. When using an Oracle-based Connection Manager there is an additional dependency. This dependency is the Oracle Services For Microsoft Transaction Server component and is available in the Oracle client installer. Below is a screen shot of the installation screen with this component highlighted. 


Once MSDTC and the Oracle Services For Microsoft Transaction Server are installed and enabled, cross-database platform transactions are a breeze.

Wednesday, May 16, 2012

SSIS: Access Network Resources on a Server Not on the Same Domain

I recently ran into a situation where my SSIS server needed access to file shares that were not on the domain but were accessible over the network via UNC path.

Typically I would create a domain-based service account and grant it access to any network resources required by the SSIS process. In this case the SSIS server needed to access files on servers on two other domains and these domains did not have a trust between them and the SSIS domain.

The solution was to dynamically create and delete the mapped drives as needed using Execute Process tasks and the NET USE command. Below is an example of this command.

NET USE Z: "\\someserver\someshare" /user:somedomain\someusername somepassword

Not the user parameter. This is where you can pass the credentials from the domain on which the share resides. If, for some reason, you want to use a mapped drive on the same domain (instead of a UNC path) you can exclude the username and password (assuming that the user under which your process is running already has access to the share).

We need to modify this a little bit to use in an Execute Process task. See below.


Note that the Executable property is set to cmd.exe. This is how we tell the task to run this command from a command prompt. Also not the /c switch. This tells the task not to display the command prompt window and to complete execution without any user intervention. If you wanted to debug the task you could replace the /c switch with /k which would display the command prompt window at the time of execution.

After this task runs our process now has the ability to use the newly mapped drive. This is where our Connection Manager comes into play. This could be any Connection Manager that requires network access such as FLATFILE, EXCEL, OLEDB Jet 4.0 for Access, etc. All we have to do is set the Connection Manager's ConnectionString property to a path using our mapped drive.


The key here is to set DelayValidation to True. If we don't do this then the package will fail validation each time because the mapped drive has not been created when SSIS attempts to validate the package. The drive is only mapped after validation is complete and the Execute Process task has run.

You may be thinking, why would validation fail each time? Isn't the mapped drive still there from the last time we ran the package? The answer is no. It's no because of the last step which is to delete the mapped drive once we are done using it. The command for deleting this drive would be the following.

NET USE Y: /delete

All we need here is the drive letter and the delete switch. Below is a screen shot of the Execute Process task.


That's all you need to access file shares with SSIS using dynamically created mapped drives. UNC paths are typically a more reliable method and what I consider to be a best practice when accessing a file system over a network. However, you might find yourself in a situation similar to mine where a mapped drive is necessary to pass credentials, other than the ones being used to run your process, to access a file system resource.


Tuesday, November 15, 2011

The Excel Connection Manager is not supported in the 64-bit version of SSIS

When attempting to execute a package that makes use of an Excel Connection Manager you may be presented with the following errors.
  • SSIS Error Code DTS_E_CANNOTACQUIRECONNECTIONFROMCONNECTIONMANAGER. The AcquireConnection method call to the connection manager "YourConnectionMgrName" failed with error code 0xC00F9304. There may be error messages posted before this with more information on why the AcquireConnection method call failed.
  • [Connection manager "YourConnectionMgrName" Error: SSIS Error Code DTS_E_OLEDB_EXCEL_NOT_SUPPORTED: The Excel Connection Manager is not supported in the 64-bit version of SSIS, as no OLE DB provider is available.
The problem is that Microsoft doesn't provide a 64-bit Excel Connect Manager component (as stated in the error). This means that to run the package it must be run using the 32-bit DTEXEC.exe. When running in BIDS (Visual Studio) it's as simple as setting a project property. Below is the default property on a 64-bit machine. Change True to False to run the package.

If you're running the package under a SQL Server Agent job you must also set a similar property on the job step that runs the package. Notice the Use 32 bit runtime property. Make sure this is checked.

Overwrite Excel File in SSIS: Workaround for Excel Connection Manager

I recently needed to create a process that would ultimately create an Excel file for import into another system. The other system was built and maintained by a third party and I had no control over it. It required that an Excel file be present in a specific directory with a specified name. The solution required that 1) if the file did not already exist it would be created and 2) if the file did already exist that it would be overwritten and a copy of the new file would be written to an archive folder with the date and time appended to the file name (so that the other historical files wouldn't be overwritten and so that it would be easy to know what date and time the file was created).

Current File Name: Extract.xls

Historical File Name: Extract_YYYYMMDD_MMSS.xls

I figured this would be easy. The first thing I did was look for the OverwriteFile or ReplaceFileproperty. What I found was that the only non-connection specific property the Excel Connection Manager exposed was FirstRowHasColumnName. At that point I figured I would experiment and find out what would happen if I tried to write to a pre-existing file. The result was that the data being written to the file was simply appended to the pre-existing data in the file. Definitely not the behavior I was looking for.

I then hit "the Google" as George W. so fondly calls it. I found solutions that proposed deleting data from worksheet(s), deleting worksheets, and creating new worksheets using the Jet 4.0 SQL syntax to "DROP" and "CREATE" tables. In Jet/Excel terms, a table is an Excel worksheet. I found that the DROP didn't actually delete the worksheet but deleted rows from the worksheet. This could have worked except that the next time the worksheet is written to, the new rows start after the last row of the previously deleted data, leaving a bunch of empty rows in the beginning of the worksheet. This approach did not cut the mustard. So ended my search for the wheel I was attempting to not reinvent.

The approach I came up with does the following.

  1. Creates a shell (only the headers) Excel file with the name Extract_wip.xls.
  2. Uses a Data Flow to populate the wip Excel file.
  3. Copies the wip file to an Archive folder but renames to Extract_YYYYMMDD_MMSS.xls.
  4. Renames the wip file to Extract.xls, overwriting the previously created Extract.xls files (if one exists).
This is a screen shot of the Control Flow.


*If you don't have an archival/historical requirement you can remove that functionality and make this solution even simpler.


Connection Managers

ExcelFile
The Connection Manager used in the final step of the process to rename the wip file to the final file name. Nothing fancy here although I would suggest making this configurable.

ExcelFileArchive
The Connection Manager used to copy the wip file to an archive folder with the date and time in the file name. Below is the expression used to generate the file name. You will want to set the Connection Manager's ConnectionString expression to this.

"C:\\ExcelExtract\\Archive\\Extract_" + RIGHT( "0000" + (DT_STR, 4 , 1252) DATEPART( "year" , GETDATE() ) , 4 ) + RIGHT( "00" + (DT_STR, 2 , 1252) DATEPART( "month" , GETDATE() ) , 2 ) + RIGHT( "00" + (DT_STR, 2 , 1252) DATEPART( "day" , GETDATE() ) , 2 ) + "_" + RIGHT( "00" + (DT_STR, 2 , 1252) DATEPART( "hour" , GETDATE() ) , 2 ) + RIGHT( "00" + (DT_STR, 2 , 1252) DATEPART( "minute" , GETDATE() ) , 2 ) + ".xls"

ExcelFileForDataFlow
This Connection Manager should point to the wip file. You'll want to have a ConnectionString expression similar to the following.

"Provider=Microsoft.Jet.OLEDB.4.0;Data Source=C:\ExcelExtract\Extract_wip.xls;Extended Properties=\"EXCEL 8.0;HDR=YES\";"

*HDR is whether the file has a header row.

ExcelFileWIP
This Connection Manager points to the wip file and is used to copy and rename the populated Excel file.

SomeOLEDBDataSource
This is used by the data flow. There could be one or more Connection Managers for your data flow.


Control Flow Tasks


Connection Type: EXCEL
Connection: ExcelFileForDataFlow
SQL Statement:

CREATE TABLE [ThisWillBeYourWorksheetName](
[SomeCharVal1] nvarchar(25),
[SomeCharVal2] nvarchar(255),
[SomeCharVal3] nvarchar(50),
[SomeDecimalVal1] double precision,
[SomeDecimalVal2] double precision,
[SomeIntegerVal1] integer)

*It is important that you use the JET syntax including the appropriate data types when writing your CREATE TABLE script.

This task will create a new Excel file with a worksheet named using the name in your CREATE TABLE script. It will use the file name found in the ExcelFileForDataFlow Connection Manager.

*If a file by the same name exists it will add a worksheet to that file. This is why we want to make sure this file does not exist when we start our process. Hence the wip file.


This is the Data Flow that writes to your Excel File. It doesn't matter what the data flow does, just make sure that it writes to an Excel Destination that uses the ExcelFileForDataFlow Connection Manager.


Destination Connection: ExcelFileForArchive
OverwriteDestination: True
Operation: Copy File
Source Connection: ExcelFileWIP

This File System Task copies the wip file to an Archive (or any other) folder using the Extract_YYYYMMDD_MMSS.xls naming convention.


Destination Connection: ExcelFile
OverwriteDestination: True
Operation: Rename File
Source Connection: ExcelFileWIP

This File System Task renames the wip file to the Extract.xls name, effectively overwriting the previously created Extract.xls file (if one exists).


Summary

While it seems like it would make sense for the Excel Connection Manager to allow for the overwriting of an existing file, it doesn't. The above process is the simplest way I have found to reproduce this seemingly lacking functionality.


Wednesday, October 12, 2011

SSIS Configuration File (.dtsconfig) Behavior (relative path issue)

Let me start by saying that I prefer SQL Server configurations over all other configuration types in SSIS for the majority of configurable values in my SSIS projects because they are more secure, easier to decipher, and fit well into database deployment methods and tools that I use.

Unfortunately, not all configurations can be of the SQL Server configuration type as we need an initial configuration that stores the connection string for the database that the SQL Server configurations live in.

This is where it becomes necessary to use an XML configuration file type of SSIS configuration. One of the problems with using an XML config file is that SSIS does not understand relative paths. This means that all environments must store the config file in the exact same directory structure, otherwise the file will not be found (except in some circumstances which I'll explain later in this post).

To get around this problem we can use something called an Indirect XML configuration file configuration type to store this single configuration containing the connection string for the SSIS configuration database. See the first configuration in the screen shot below.


The beauty of this configuration type is that it allows you to use an XML config file in such a way that its location is not environment specific. It does this by getting the location of the XML config file from a Windows Environment Variable. Unfortunately this must be created in environments where SSIS packages are being developed (where BIDS is installed) and in runtime environments where the config file does not live in the same directory as the SSIS packages being executed. While this does require added effort, it only has to be done once per environment. Below is a screen shot of the creation of a sample Environment Variable.


If you store your XML configuration file (.dtsconfig) in the same directory as the rest of your SSIS packages (.dtsx) then it is not necessary to create this environment variable on machines where your packages will be executed by the SSIS runtime and/or dtexec/dtexecui. SSIS will attempt to find the Environment Variable and when it cannot, it will then look in the root path of the SSIS packages and use the config file found there.

However, if your design requires that you store your XML config file in a location other than your package location you must create the Environment Variable in all locations.

At the risk of repeating myself, BIDS will not be able to find your config file unless you hard-code it's absolute path in a regular XML configuration file configuration (non-Indirect XML configuration) or create an Indirect XML configuration using an Environment Variable. This is true even if the config file lives in the same directory as your packages. This works fine when there is only one developer and that developer uses only machine to develop. Once you have multiple development team members with potentially different directory structures, you can avoid many headaches by making your XML config file location environment agnostic. Don't fear the Environment Variable!